This tutorial shows you where to find the setting in the Kwoot admin, what to modify and where to control the result on the team side or on the client side.
Before you begin, keep your establishment's actual information on hand: offer, commercial rules, conditions, customer texts or visual elements depending on the setting concerned.
Configuration steps
- Open Form > Email Preview.
- Filter by category to see customer and admin emails.
- Check that the colors, logo, links and payment information are correct.
- Correct the appearance or billing settings if an email doesn't suit you.
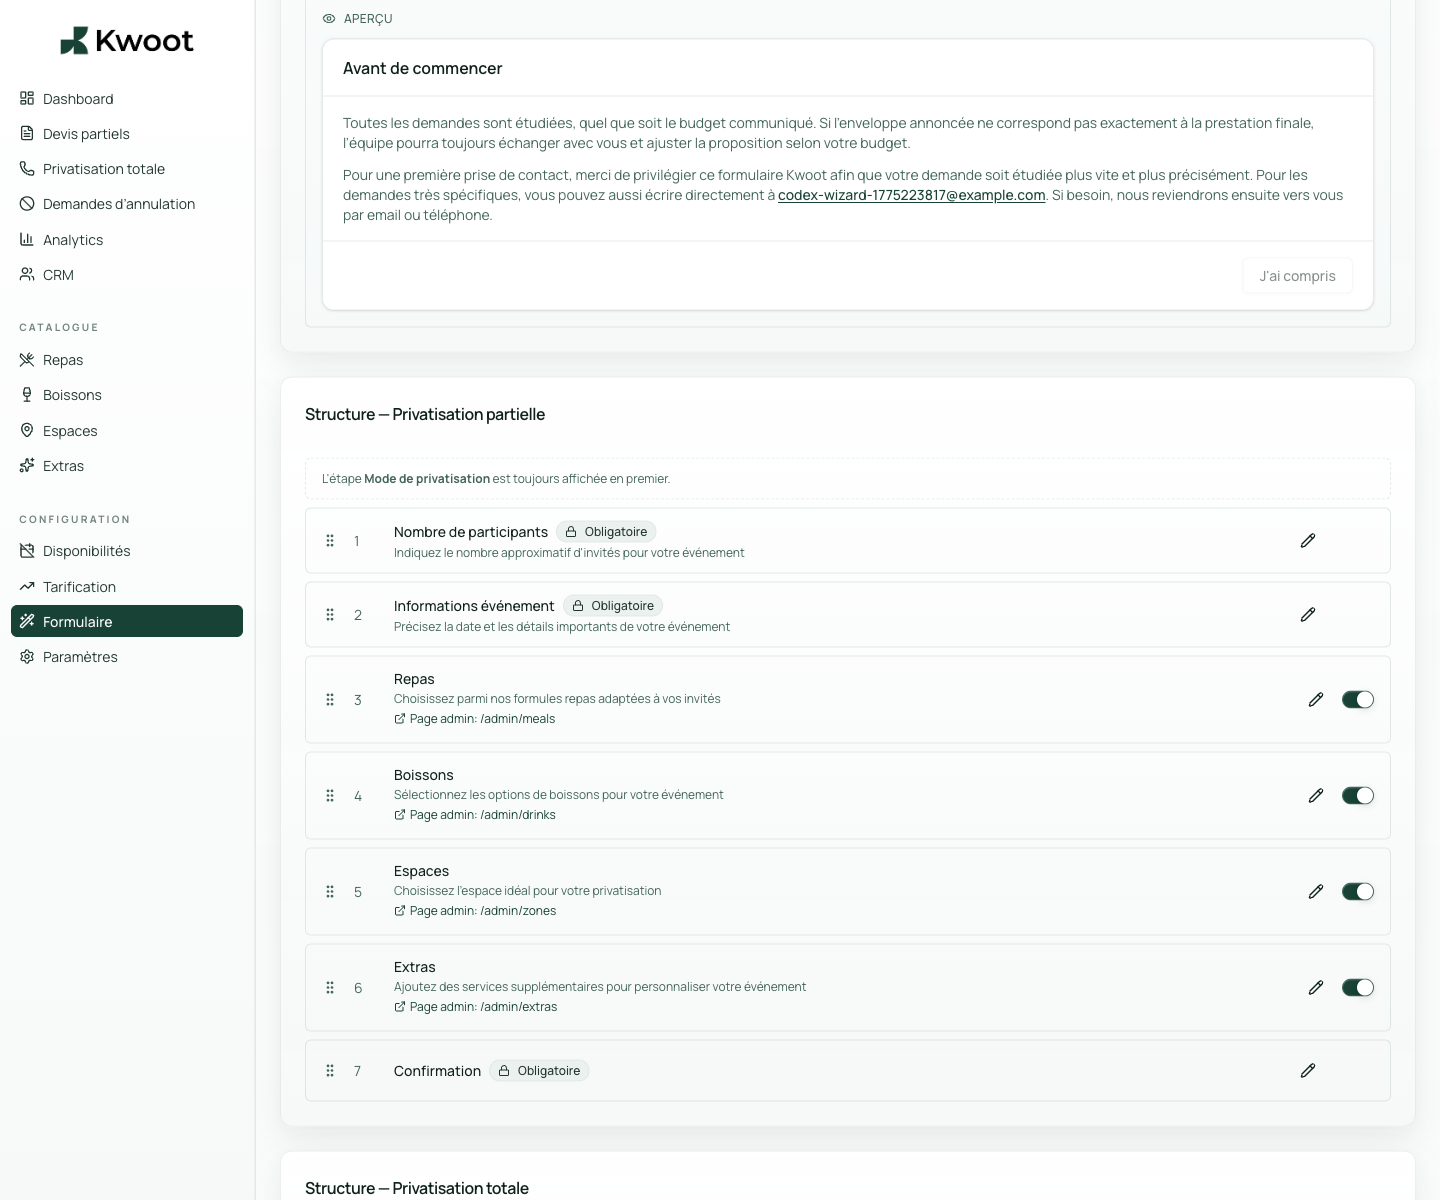
Captures to follow
The screenshots below show the setting in the admin, then the places where the change may appear in the form, quote, customer portal or internal tracking.
Save, reload the public form or folder, and create a quick test. If the text, price or document is unclear to a customer, correct it before going live.
Continue setup
The form can be sent by direct link or integrated into your site. This is what makes it possible to replace a simple “contact us” button.
Open → Following Create menus and meal plansMenus should be specific enough to sell, but not too long. Kwoot can display seated options, cocktails, tapas or specific requests.
Open →